Boil-and-bite mouthpieces are popular for their versatility in dental and sports applications. These mouthpieces mold to your teeth for a custom fit, offering protection and comfort. This guide provides step-by-step instructions to ensure proper shaping and adjustment, addressing common concerns and special cases like braces. Follow these steps to achieve a secure, personalized fit for optimal performance and safety.
Overview of the Boil and Bite Method
The boil-and-bite method is a widely used technique for customizing mouthpieces, such as mouthguards or dental appliances. It involves submerging the mouthpiece in boiling water to soften the material, allowing it to mold to the shape of the user’s teeth and gums. After cooling slightly, the user bites down to create a precise fit. This process ensures a snug, comfortable, and protective alignment, making it ideal for both dental and sports applications. The method is simple, cost-effective, and provides a tailored solution for individuals seeking a personalized fit without the need for professional dental impressions.
Importance of Proper Fit for Mouthpieces
A proper fit is crucial for the effectiveness and comfort of a mouthpiece. A well-fitted mouthpiece ensures optimal protection, prevents discomfort, and enhances performance in sports or dental applications. If the fit is too loose, it may shift during use, reducing its protective capabilities. Conversely, a mouthpiece that is too tight can cause irritation or difficulty breathing. Achieving the right balance ensures clear speech, ease of breathing, and maximum comfort. A proper fit also prevents the mouthpiece from causing gum irritation or misalignment. Regularly checking and adjusting the fit is essential to maintain its functionality and ensure it remains secure during use. Proper fit is key to both safety and satisfaction, making it a critical step in the customization process.
Preparation for Boiling the Mouthpiece
Gathering necessary materials is essential for a successful boil-and-bite process. Ensure you have a pot, tongs, cold water, a towel, and scissors ready for proper preparation.
Gathering Necessary Materials
To begin, you’ll need a few essential items to ensure the boil-and-bite process is smooth and effective. Start by gathering a large pot to boil water, ensuring it’s deep enough to fully submerge the mouthpiece. A pair of tongs or a slotted spoon will help safely handle the mouthpiece once it’s boiling. Additionally, prepare a bowl of cold water, as this will be used to cool the mouthpiece after boiling. You’ll also need a clean, flat surface to work on and a towel to dry excess water. Finally, keep a pair of sharp scissors nearby to trim any excess material once the mouthpiece has been shaped. Having all these materials ready beforehand will save time and ensure a proper fit.
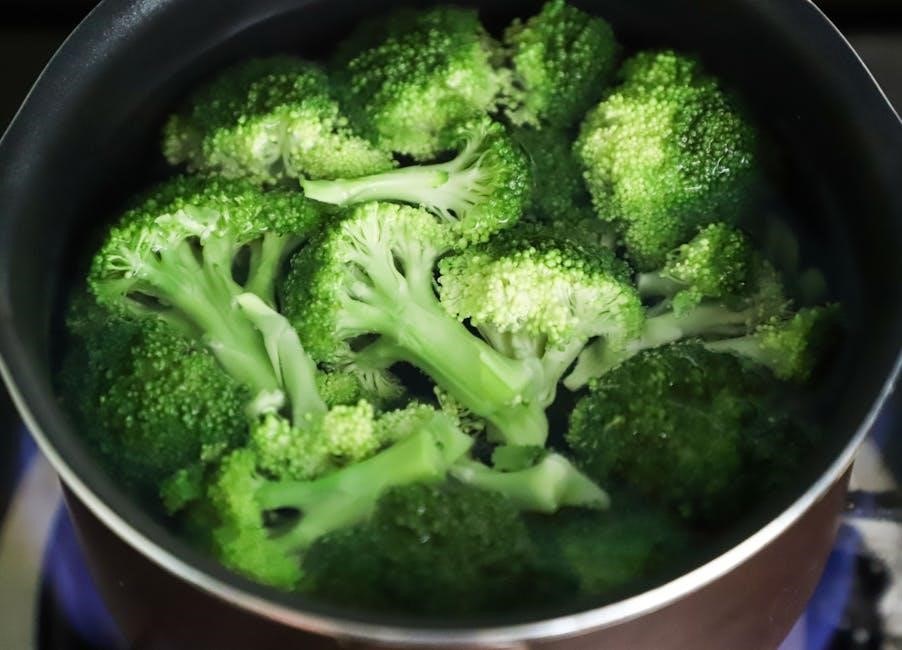
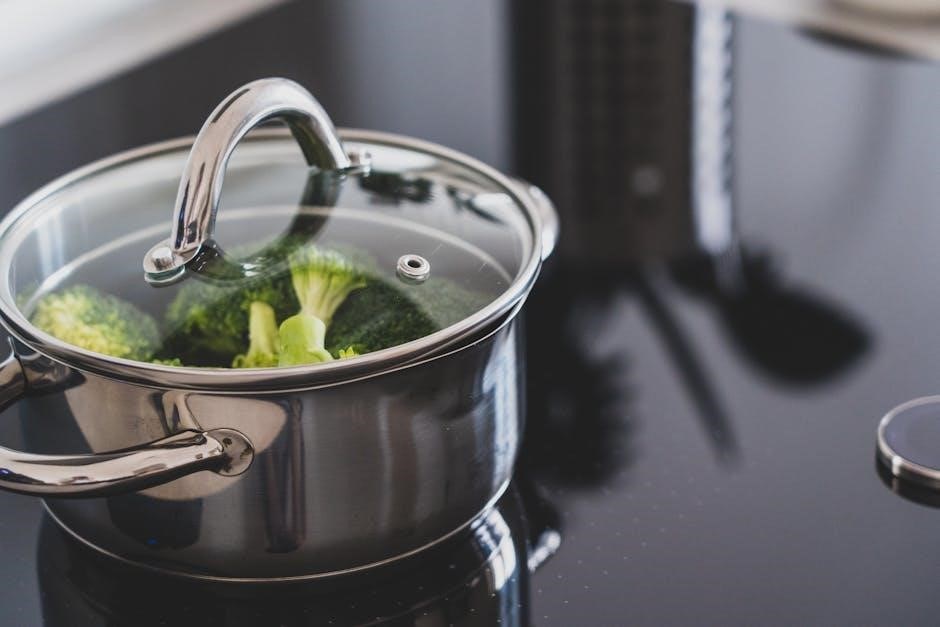
Boiling Water and Initial Setup
Start by filling a large pot with enough water to fully submerge the mouthpiece. Bring the water to a rolling boil, ensuring it reaches a temperature that will soften the material without damaging it. While waiting for the water to boil, prepare a bowl of cold water nearby to cool the mouthpiece after boiling. Once the water is boiling, carefully submerge the mouthpiece using tongs or a slotted spoon, making sure it is fully covered. Allow it to sit in the boiling water for about 30 seconds to soften. Remove it with the tongs and briefly let it cool for a few seconds before moving on to shaping. This step is crucial for achieving the right pliability for molding.
Boiling and Shaping the Mouthpiece
Boil the mouthpiece in water until pliable, then carefully remove and let it cool slightly. Shape it in your mouth, ensuring a snug, comfortable fit for optimal protection.
Submerging the Mouthpiece in Boiling Water
Bring water to a rolling boil in a pot, then carefully submerge the mouthpiece using tongs to avoid burns. Ensure it is fully underwater for 30 seconds to soften the material. Do not leave it longer than recommended, as this could damage the mouthpiece. After boiling, remove it with tongs and let it cool for about 20 seconds until it is warm but not scalding. This step is crucial to make the material pliable for shaping. Be cautious, as the mouthpiece will still be hot. Proper submersion ensures even softening, allowing for a better fit during the molding process. Proceed to the next step immediately after cooling to achieve the best results.
Allowing the Mouthpiece to Cool
After boiling, remove the mouthpiece from the water with tongs and place it on a heat-resistant surface; Let it cool for about 20 seconds until it’s warm but not scalding. This brief cooling period ensures the mouthpiece is safe to handle without causing burns. Avoid letting it cool too long, as it will begin to harden again, making it difficult to shape. The ideal temperature is warm enough to mold but cool enough to prevent discomfort or injury. Proper cooling is essential for a safe and effective fitting process. Once cooled sufficiently, proceed to shape the mouthpiece in your mouth while it’s still pliable. This step balances safety and effectiveness, ensuring a comfortable and secure fit.

Shaping the Mouthpiece in the Mouth
Once the mouthpiece has cooled slightly, carefully place it into your mouth, ensuring it covers the upper teeth and aligns with your dental structure. Gently bite down and press the mouthpiece against your teeth with your fingers for about 30 seconds. This action molds the softened material to your teeth, creating a snug fit. After shaping, remove the mouthpiece and immediately submerge it in cold water to stop the cooling process. This step ensures the mouthpiece retains its new shape and provides a secure fit. Proper shaping is crucial for comfort and effectiveness, as it adapts to your unique dental profile. If necessary, repeat the process to achieve the desired fit.
Final Adjustments and Fit Check
After shaping, trim excess material for comfort and ensure a snug fit. Check if the mouthpiece allows easy breathing and speaking. Adjust as needed for optimal protection and comfort.
Trimming Excess Material for Comfort
After shaping the mouthpiece, use sharp scissors or a craft knife to trim any excess material for a comfortable fit. Ensure the edges are smooth and even, avoiding sharp points that could irritate your mouth. Carefully cut along the edges, leaving enough material to cover your teeth adequately. It’s important to test the fit regularly while trimming to avoid removing too much material. If the mouthpiece feels too bulky, trim small amounts at a time until it feels comfortable. Avoid trimming too aggressively, as this can compromise the protective coverage. The goal is to achieve a balance between comfort and protection, ensuring the mouthpiece stays securely in place without causing discomfort or irritation.
Verifying the Fit and Comfort
Once the mouthpiece is trimmed and adjusted, verify its fit by inserting it into your mouth and checking for comfort and stability. Ensure it covers all necessary teeth without feeling too tight or causing discomfort. You should be able to speak and breathe easily while wearing it. If the mouthpiece feels loose, reheat and reshape it as needed. Use a mirror to inspect how it sits in your mouth, making sure it aligns properly with your teeth and gums. Pay attention to areas that may cause irritation or pressure points. Proper fit ensures maximum protection and comfort during use. Adjustments may be necessary to achieve the ideal balance between security and ease of wear.

Special Considerations
Special considerations ensure proper fit and comfort for unique dental needs, such as using a boil-and-bite mouthpiece with braces for necessary protection.
Using a Boil and Bite Mouthpiece with Braces
Boil-and-bite mouthpieces can be used with braces, but proper fit and care are essential. Start by boiling the mouthpiece for 30 seconds, then let it cool for 20 seconds. Gently bite down to mold it around your braces and teeth. Ensure the mouthpiece does not wrap around the braces, as this can cause discomfort or misalignment. Trim excess material for comfort and to avoid irritation. Anti-slip pads can be added for better stability. Regular cleaning and storage are crucial to maintain hygiene and shape. If unsure, consult a dentist for the best fit and safety, especially with braces.
Maintenance and Care
Regularly clean your mouthpiece with mild soap and rinse thoroughly. Store it in a protective case to prevent deformation. Replace it if damaged or worn.
Cleaning and Storing the Mouthpiece
Regular cleaning and proper storage are essential to maintain the mouthpiece’s quality and hygiene. Use mild soap and warm water to clean it, avoiding harsh chemicals or abrasive materials. Rinse thoroughly to remove any residue. After cleaning, store the mouthpiece in a protective case to prevent deformation or damage. Avoid exposing it to extreme temperatures, as this can alter its shape. For optimal maintenance, inspect the mouthpiece regularly for signs of wear or tears. If damaged, consider replacing it to ensure continued protection and comfort. Proper care extends the lifespan of the mouthpiece, ensuring it remains effective and comfortable for long-term use.
Troubleshooting Common Issues
Common issues with boil-and-bite mouthpieces include improper fit, material sticking, or lack of retention. If the mouthpiece feels too tight or causes discomfort, re-boil and reshape it carefully. For sticking issues, ensure the mouthpiece cools slightly before molding. If it becomes loose over time, re-boil and re-mold it. Avoid overheating the mouthpiece, as this can damage the material. For mouthpieces with braces, ensure proper alignment to prevent shifting. If the mouthpiece fails to mold correctly, try soaking it longer in boiling water. Always follow the manufacturer’s instructions and consult a professional if issues persist. Regular maintenance and proper storage can help prevent these problems, ensuring a secure and comfortable fit.