Manual Camera Settings Cheat Sheet PDF: A Comprehensive Guide
Modern smartphone cameras offer incredible capabilities, yet mastering manual settings unlocks true creative control, mirroring professional photography techniques for stunning results․
Embarking on a journey into manual camera control empowers photographers to transcend automatic modes, gaining complete artistic authority over their images․ This shift, fueled by increasingly sophisticated smartphone technology – like those from Samsung and iPhone – allows for nuanced adjustments previously exclusive to professional DSLRs․
Understanding these settings isn’t about complexity; it’s about intentionality․ It’s about moving beyond simply capturing a moment to crafting a vision․ The evolution of camera technology, sparked by devices like early Windows-powered Nokia smartphones, has democratized this power, making it accessible to everyone․
Why Use Manual Settings?
Stepping away from automatic modes grants photographers unparalleled creative freedom and control over the final image․ While modern smartphone cameras excel in auto, they often lack the nuance needed for specific artistic visions․ Manual control allows you to override the camera’s decisions, tailoring exposure, focus, and color to your intent․
This is especially crucial when dealing with challenging lighting conditions or when aiming for a particular aesthetic․ The advancements in phone camera tech, reminiscent of the initial spark from Nokia smartphones, now support this level of customization, enabling photographers to truly express themselves․
Understanding the Exposure Triangle
The exposure triangle consists of aperture, shutter speed, and ISO – three interconnected settings that determine image brightness․ Mastering their relationship is fundamental to manual control․ Adjusting one setting necessitates compensating with others to maintain proper exposure․ Think of it as a balancing act; widening the aperture lets in more light, requiring a faster shutter speed or lower ISO․
Understanding this interplay, much like the evolution from feature phones to sophisticated smartphones, unlocks creative possibilities․ It’s the core principle behind achieving well-exposed and artistically compelling photographs․
Aperture: Controlling Depth of Field
Aperture, measured in f-stops (like f/2․8 or f/16), controls the lens opening size․ A wider aperture (lower f-number) creates a shallow depth of field, blurring the background – ideal for portraits․ Conversely, a narrower aperture (higher f-number) yields greater depth of field, keeping more of the scene sharp, perfect for landscapes․
This control, mirroring the advancements in smartphone camera technology, allows photographers to isolate subjects or capture expansive scenes․ Mastering aperture is key to artistic vision, much like a first smartphone sparked technological interest․
What is Aperture? (f-stop)
Aperture refers to the opening within your lens that allows light to pass through to the camera sensor․ It’s measured in f-stops – a seemingly counterintuitive system where a lower number (like f/1․8) indicates a wider opening, and a higher number (like f/22) signifies a narrower opening․
Think of it like the pupil of your eye; it expands in low light and contracts in bright light․ This adjustment directly impacts both the brightness of your image and the depth of field, a crucial element in photographic composition, much like early smartphones sparked curiosity․
Aperture and Bokeh
Bokeh, the aesthetically pleasing blur in the out-of-focus areas of an image, is heavily influenced by aperture․ A wider aperture (lower f-stop, like f/1․8) creates a shallower depth of field, resulting in more pronounced bokeh․ This is ideal for portraits, isolating your subject with a beautifully blurred background․
Conversely, a narrower aperture (higher f-stop, like f/16) yields a greater depth of field, keeping more of the scene in focus – perfect for landscapes․ Just as technology evolved from feature phones, understanding aperture unlocks artistic control․

Aperture for Different Photography Genres
Aperture selection is genre-specific․ For portraits, f/1․8 – f/2․8 isolates subjects beautifully, creating soft bokeh․ Landscape photography benefits from f/8 – f/16, maximizing depth of field for sharpness throughout the scene․ Street photography often uses f/4 – f/5․6, balancing sharpness and background blur․
Macro photography demands precise control; f/8 – f/16 ensures sufficient focus․ Like the leap from early smartphones to today’s technology, mastering aperture adapts to diverse photographic needs, enhancing creative expression․
Shutter Speed: Capturing Motion
Shutter speed dictates how long the camera’s sensor is exposed to light, fundamentally impacting motion depiction․ Faster shutter speeds (e․g․, 1/1000s) freeze action, ideal for sports or wildlife․ Slower speeds (e․g․, 1/30s) create motion blur, conveying a sense of movement, like flowing water․
Just as smartphone camera technology has evolved, understanding shutter speed is crucial․ Low-light scenarios necessitate slower speeds, potentially requiring a tripod to avoid camera shake․ Experimentation unlocks creative possibilities, mirroring the advancements in mobile photography․
What is Shutter Speed?
Shutter speed is measured in seconds or fractions of a second, representing the duration the camera sensor is exposed to light․ Think of it as a curtain opening and closing․ A faster shutter speed means a shorter exposure, capturing a fleeting moment․ Conversely, a slower shutter speed allows more light in, but also captures movement as blur․
Modern smartphones, despite their technological leaps, still rely on this fundamental principle․ Mastering shutter speed is key to controlling how motion is rendered in your images, mirroring professional techniques․
Freezing Action vs․ Motion Blur
Fast shutter speeds (like 1/500s or faster) “freeze” motion, ideal for sports or wildlife photography, capturing sharp details of fast-moving subjects․ Conversely, slow shutter speeds (like 1/30s or slower) create motion blur, conveying a sense of speed or movement․
Experimenting with these settings, even on a smartphone, allows creative control․ Remember, the “right” speed depends on the subject and desired effect․ Understanding this balance is crucial for impactful photography, mirroring professional techniques․
Shutter Speed and Low Light Photography
In low light, slower shutter speeds are essential to allow more light to reach the camera sensor, brightening the image․ However, this increases the risk of motion blur, especially if handholding the camera․ Utilizing a tripod becomes crucial for sharp results in these conditions․
Increasing ISO can also help, but introduces noise․ Finding the balance between shutter speed, ISO, and aperture is key․ Mastering this interplay unlocks the potential for stunning low-light photography, even with smartphone cameras․
ISO: Sensitivity to Light
ISO determines your camera sensor’s sensitivity to light․ Lower ISO values (like 100) are less sensitive, producing cleaner images in bright conditions․ Higher ISO values (like 3200 or higher) increase sensitivity, enabling shooting in darker environments, but at the cost of image quality;
Increasing ISO introduces digital noise – graininess that degrades detail․ Understanding the trade-off between brightness and noise is vital․ Modern cameras handle higher ISOs better, but minimizing ISO whenever possible remains best practice for optimal image clarity․
What is ISO?
ISO, in photography, measures the sensitivity of your camera’s image sensor to light․ It’s expressed as a number – 100, 200, 400, and so on․ A lower ISO (like 100) means the sensor is less sensitive, requiring more light for a proper exposure․ Conversely, a higher ISO (like 3200) makes the sensor more sensitive, allowing you to shoot in dimmer conditions․
Think of it as amplifying the light signal․ While helpful in low light, increasing ISO also amplifies noise, potentially degrading image quality․ It’s a crucial element of the exposure triangle․
ISO and Noise
Increasing the ISO setting amplifies the signal from your camera’s sensor, but unfortunately, it also amplifies random variations in that signal – this manifests as “noise” in your images․ Noise appears as graininess or speckling, reducing detail and clarity․ Lower ISO values (100-400) generally produce cleaner images with minimal noise․
Higher ISOs (800 and above) introduce more noticeable noise․ Modern cameras handle high ISOs better than older models, but noise is still a trade-off for shooting in low light․ Balancing ISO with aperture and shutter speed is key․
Choosing the Right ISO Value
Selecting the appropriate ISO depends heavily on the lighting conditions and your desired outcome․ Start with the lowest possible ISO (usually 100) for bright daylight to maximize image quality and minimize noise․ As light diminishes, gradually increase the ISO․
For indoor shooting or overcast days, ISO 400-800 might be suitable․ In very low light, you may need to go higher, accepting some noise for a properly exposed image․ Prioritize keeping ISO as low as possible while maintaining a usable shutter speed and aperture․
Metering Modes: How Your Camera Reads Light
Your camera’s metering mode dictates how it analyzes a scene’s light to determine the correct exposure․ Understanding these modes is crucial for accurate results․ Evaluative/Matrix Metering assesses the entire scene, ideal for general use․ Center-Weighted Metering prioritizes the center of the frame, useful for portraits․
Spot Metering measures light from a very small area, perfect for challenging lighting situations where precise exposure is needed․ Experiment with each mode to see which best suits your subject and the surrounding environment for optimal image capture․
Evaluative/Matrix Metering
Evaluative (Canon) or Matrix (Nikon) metering is your camera’s default, all-purpose mode․ It analyzes the entire scene, dividing it into segments and assessing light levels across each․ This mode attempts to deliver a balanced exposure, suitable for most everyday shooting scenarios․
It’s particularly effective in scenes with relatively even lighting․ However, it can be fooled by strong backlighting or high-contrast situations․ For consistent results, understand its limitations and be prepared to use exposure compensation when needed․
Center-Weighted Metering
Center-weighted metering prioritizes the light readings from the center of the frame, gradually decreasing sensitivity as you move towards the edges․ This mode is beneficial when your primary subject is positioned centrally, ensuring it’s properly exposed․
It’s a good choice for portraits or subjects isolated against a simpler background․ However, strong light sources near the edges can still influence the overall exposure․ Like evaluative metering, exposure compensation might be necessary for optimal results in challenging lighting conditions․
Spot Metering
Spot metering is the most precise metering mode, measuring light from a very small area – typically around 1-5% of the frame, centered on your focus point․ This is incredibly useful when dealing with high-contrast scenes, allowing you to expose specifically for your subject․

It’s ideal for backlit subjects or situations where the background is significantly brighter or darker․ However, it requires careful aiming and understanding of the scene; incorrect placement will lead to misexposure․ Exposure compensation is almost always needed with spot metering․
Focus Modes: Achieving Sharpness
Achieving sharp images relies heavily on selecting the correct focus mode․ Cameras offer several options tailored to different shooting scenarios․ Single-Point Autofocus is best for static subjects, locking focus on a specific point when the shutter button is half-pressed․
Continuous Autofocus (AI Servo/AF-C) tracks moving subjects, constantly adjusting focus as they change position – perfect for sports or wildlife․ Manual Focus provides complete control, useful in low light or when autofocus struggles, requiring precise adjustments via the focusing ring․
Single-Point Autofocus
Single-Point Autofocus is a foundational focusing method, ideal for stationary subjects where precise focus is crucial․ The camera focuses solely on the selected point, ignoring surrounding areas․ This mode excels in portraiture, landscape photography, and macro shots, ensuring your intended subject is tack-sharp․
To use it, select a single focus point within your frame, typically using the camera’s joystick or touchscreen․ Half-press the shutter button to lock focus, then recompose your shot if needed, before fully pressing to capture the image․
Continuous Autofocus (AI Servo/AF-C)
Continuous Autofocus, often labeled AI Servo (Canon) or AF-C (Nikon/Sony), is designed for tracking moving subjects․ Unlike single-point, it continuously adjusts focus as the subject’s distance changes, maintaining sharpness throughout the action․ This mode is essential for sports, wildlife, and any scenario involving unpredictable movement․
Activate it in your camera’s autofocus settings, then half-press the shutter button and pan with the subject․ The camera will relentlessly track and refocus, ensuring a sharp image even during rapid motion․ Mastering this mode requires practice!
Manual Focus
Manual Focus (MF) relinquishes autofocus control, placing it entirely in your hands․ This is invaluable when autofocus struggles – low light, low contrast scenes, or shooting through obstructions like fences․ Switch your lens to MF and use the focusing ring to precisely adjust sharpness, often aided by focus peaking or magnification features on modern cameras;
It demands patience and a keen eye, but offers ultimate precision․ Practice is key to developing muscle memory and quickly achieving critical focus․ Manual focus is a skill that elevates your photographic control!
White Balance: Accurate Color Representation
White balance (WB) ensures colors appear natural, correcting for different lighting conditions․ Auto White Balance (AWB) is convenient, but often inaccurate․ Manual control offers superior results․ Different light sources – sunlight, shade, tungsten, fluorescent – emit varying color temperatures․
Preset WB settings provide quick fixes for common scenarios․ Custom WB allows you to precisely calibrate color using a grey card for ultimate accuracy․ Mastering WB is crucial for achieving consistent, pleasing colors in your photographs, avoiding unwanted color casts․
Auto White Balance (AWB)
Auto White Balance (AWB) is the default setting on most cameras, attempting to neutralize color casts automatically․ While convenient for quick snapshots, AWB isn’t foolproof․ It can struggle with mixed lighting or unusual sources, leading to inaccurate colors․
AWB analyzes the scene and estimates the correct color temperature․ However, it can be fooled by dominant colors, resulting in images that appear too warm or too cool․ For critical work, relying on manual white balance settings provides far more predictable and accurate results than AWB․
Preset White Balance Settings
Preset White Balance settings offer a convenient middle ground between AWB and custom settings․ Cameras typically include presets for common lighting conditions like Daylight, Cloudy, Shade, Tungsten (incandescent), and Fluorescent․
These presets apply a fixed color temperature correction, offering more accuracy than AWB in predictable situations․ Selecting the correct preset significantly improves color rendition, especially when AWB struggles․ Experimenting with presets is a quick way to achieve better results without complex calibration, providing a reliable alternative for consistent color․
Custom White Balance
Custom White Balance provides ultimate color accuracy, crucial for professional results; This involves using a grey card or white object to tell the camera what “white” should look like under the current lighting conditions․
The camera then calculates the correct color temperature, ensuring neutral tones and vibrant colors․ This method is invaluable in challenging lighting, where presets or AWB fall short․ While requiring a bit more effort, custom white balance guarantees consistent and accurate color representation, eliminating unwanted color casts in your photographs․
Drive Modes: Single Shot, Continuous, and Self-Timer
Drive modes dictate how the camera captures images when the shutter is pressed․ Single Shot mode takes one picture each time the shutter is fully pressed, ideal for static subjects and careful composition․
Continuous Shooting mode captures multiple frames per second, perfect for action or capturing fleeting moments․ Self-Timer mode introduces a delay before the shutter fires, allowing the photographer to be included in the shot․ Understanding these modes expands your photographic possibilities, enabling you to capture the perfect image in any situation․
Single Shot Mode
Single Shot mode, often the default setting, is the most straightforward way to capture a photograph․ Each full press of the shutter button results in a single image being recorded․ This mode prioritizes precision and control, making it excellent for portraits, landscapes, and any scene where deliberate composition is key;
It’s ideal when your subject is stationary and you want to ensure each shot is carefully framed․ Single Shot mode conserves battery life and storage space compared to continuous shooting, offering a balanced approach to photography․
Continuous Shooting Mode
Continuous Shooting Mode, sometimes called burst mode, captures multiple images in rapid succession with each press and hold of the shutter button․ This is invaluable for photographing fast-moving subjects like sports, wildlife, or children, increasing your chances of capturing the perfect moment․
The camera continues shooting until you release the shutter or the memory buffer is full․ While it consumes more battery and storage, continuous shooting provides a series of shots to choose from, ensuring you don’t miss critical action․
Self-Timer Mode
Self-Timer Mode introduces a delay between pressing the shutter button and the camera actually taking the picture․ Typically, options include 2, 5, or 10-second delays, allowing the photographer to join the scene․ This is perfect for group photos where you want to be included, or for situations requiring stability – minimizing camera shake when using a tripod․
The delay provides time to compose yourself and ensures the camera is steady, resulting in sharper images․ It’s a simple yet effective tool for expanding photographic possibilities beyond solo shots․
Picture Styles/Profiles: Customizing Image Look
Picture Styles, or Profiles, offer pre-set adjustments to color, contrast, and sharpness, influencing the final aesthetic of your photographs without altering the raw data․ These profiles provide a quick way to tailor images to specific subjects or preferences․ Common options include Standard, Portrait, Landscape, Neutral, Faithful, and Monochrome․
Standard delivers vibrant, all-purpose results, while Portrait prioritizes skin tones․ Landscape enhances blues and greens․ Experimenting with these profiles allows photographers to achieve desired looks directly in-camera, reducing post-processing needs․
Standard/Normal Picture Style
The Standard Picture Style is often the default setting on many cameras, designed to deliver well-rounded, visually appealing images straight out of the camera․ It provides a balance of sharpness, contrast, and color saturation, making it suitable for a wide range of photographic scenarios․
This profile aims for realistic representation, without excessive enhancement, offering a good starting point for beginners․ While versatile, it may not be ideal for specific genres requiring unique aesthetics․ Photographers often use Standard as a base for further customization․
Portrait Picture Style
The Portrait Picture Style prioritizes capturing flattering images of people, often softening skin tones and reducing contrast for a more pleasing aesthetic․ It typically lowers sharpness slightly to minimize imperfections and enhances warm colors, creating a healthy glow․
This mode is excellent for headshots and close-up portraits, aiming to make subjects appear more attractive․ However, it might not be suitable for landscapes or scenes requiring high detail․ Adjusting settings within Portrait can fine-tune the effect to your preference․
Landscape Picture Style
The Landscape Picture Style is designed to maximize detail and clarity in outdoor scenes, prioritizing sharpness and vibrant colors․ It typically boosts saturation and contrast, enhancing the natural beauty of landscapes․ This mode often favors cooler tones, bringing out the blues in skies and greens in foliage․
Ideal for capturing expansive vistas and detailed scenery, Landscape aims to create visually striking images․ It’s less focused on softening or flattering subjects, instead emphasizing the environment’s grandeur․ Experiment with adjustments for personalized results․
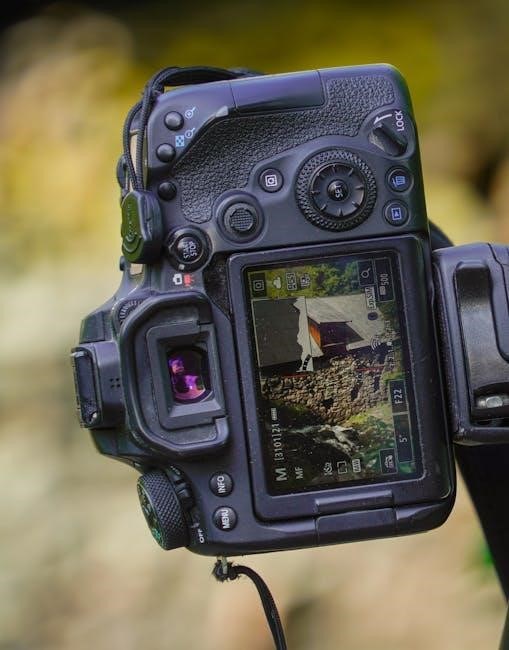
Histograms: Visualizing Exposure
Histograms are graphical representations of tonal distribution within an image, crucial for assessing exposure accuracy․ They display brightness values, ranging from dark (left) to bright (right), showing the frequency of each tone․ A balanced histogram generally indicates a well-exposed photograph․
Understanding histograms prevents over or underexposure, offering a more objective evaluation than relying solely on the camera’s LCD screen․ Learning to ‘read’ a histogram empowers photographers to make informed adjustments, ensuring optimal image quality and preserving detail in both shadows and highlights․
Reading a Histogram
A histogram’s horizontal axis represents brightness values, from black (0) to white (255)․ The vertical axis shows the number of pixels at each brightness level․ Peaks indicate dominant tones; a peak to the left suggests a dark image, while a peak to the right indicates a bright image․
A histogram crammed against either side signals clipped highlights or shadows, meaning detail is lost․ Ideally, a histogram stretches across the entire range, indicating a full tonal spectrum․ Analyzing the shape reveals exposure issues, guiding adjustments to aperture, shutter speed, or ISO for optimal results․
Using Histograms to Avoid Over/Under Exposure
Histograms are crucial for preventing blown-out highlights or crushed shadows․ If the graph bunches to the right, reduce exposure (lower aperture, faster shutter speed, or lower ISO) to recover detail in bright areas․ Conversely, a left-leaning histogram indicates underexposure; increase exposure to brighten shadows․
Aim for a balanced histogram, though artistic intent may dictate otherwise․ Regularly check the histogram while shooting, especially in challenging lighting․ This proactive approach ensures well-exposed images with maximum dynamic range, minimizing post-processing adjustments and preserving image quality․
Creating Your Cheat Sheet PDF
Consolidate your newfound knowledge into a portable reference guide! Utilize word processing software or graphic design tools to compile essential settings – aperture, shutter speed, ISO, white balance – for various shooting scenarios․ Include metering mode recommendations and focus techniques․
Design a visually clear layout for quick reference in the field․ Save as a PDF to ensure consistent formatting across devices․ Regularly update your cheat sheet as you gain experience and refine your preferred settings․ A personalized PDF empowers confident, creative control on every shoot․
Resources for Further Learning
Expand your photographic expertise beyond this guide! Explore online platforms like YouTube, offering countless tutorials on manual camera settings and techniques․ Websites such as Digital Photography School and Photography Life provide in-depth articles and reviews․
Consider online courses from platforms like Skillshare or Udemy for structured learning․ Don’t underestimate the power of photography communities and forums for peer-to-peer learning and inspiration․ Continuous learning is key to mastering your camera and unlocking your creative vision․
Troubleshooting Common Issues
Encountering problems is part of the learning process! If images are consistently too dark or bright, revisit your exposure triangle – aperture, shutter speed, and ISO․ Blurry photos often indicate incorrect focus settings or too slow a shutter speed․
Noise in low-light situations suggests a high ISO value; try lowering it if possible․ Remember to check your metering mode for accurate light readings․ Experiment and don’t be afraid to review your settings after each shot to identify areas for improvement․